
Azure Single-Sign-on Setup
The following describes how to set up Single-Sign-on in dbFront using Azure (Azure.com).
Note: Microsoft offers a Free Azure Active Directory account, which can be great for testing Single-Sign-on. For pricing and limits, see: Azure Active Directory Pricing. The most significant limit of the free version is that you can't configure a Public Certificate (therefore not secure).
Information Collection
When setting up Azure Single-Sign-on you need to collect or decide on the following pieces of information:
- Determine a display name for your application. e.g. "dbFront - Records Maintenance",
- Determine the root URL for your dbFront install. This would be something like:
- https://dbFront.YourCompany.com/dbFront/ (public server with SSL)
- http://localhost/dbFront/ (Non-SSL testing URL)
- NOTE: Azure requires SSL for all except "localhost".
- Create a unique application id: A suggested value is "sp.dbFront.YourCompany.com",
- Determine / Create an Azure group for administrators: e.g. "dbFrontAdmins".
Register an Azure Application
- Browse to Azure and logon: https://portal.azure.com,
- On the Azure Home screen click on Enterprise Applications services link to view the configured applications,
- Click on New application to configure a new application,
- Click on "Create your own application" at the top of the screen,
- When prompted for an application name enter something like "dbFront - Records Maintenance",
- Choose "Register an application to integrate with Microsoft Entra ID (App you're developing)",
- Click Create,
- This will open a window with the following prompts;
- Name: Set with the Display name previously chosen,
- Supported account types: Set as appropriate for your needs,
- Redirect URI: You need to enter two URLs. Both should match the root URL for your dbFront install,
e.g. "https://dbFront.YourCompany.com/dbFront/default.aspx"- The first should be the root URL without the "/default.aspx",
- The second URL must include the "/default.aspx" at the end.
- Click on the blue Register button to create your new Azure application,
- This will open your new Azure application in the [Overview] screen.
Access the Azure Application Registration
Application registrations are accessed via their Enterprise Application container or the search at the top of the screen. If you know your application name, then type it in and you should see two entries, a "Application" and a "Service Principal". Click on the "Service Principal" to edit.
If not found, then open the Enterprise Applications, find your entry, open it, switch to Properties, and open the Application Registration.
Edit your Azure Application Registration
The following sections are accessed from the Application Registration / Manage menu. See above to open.
Overview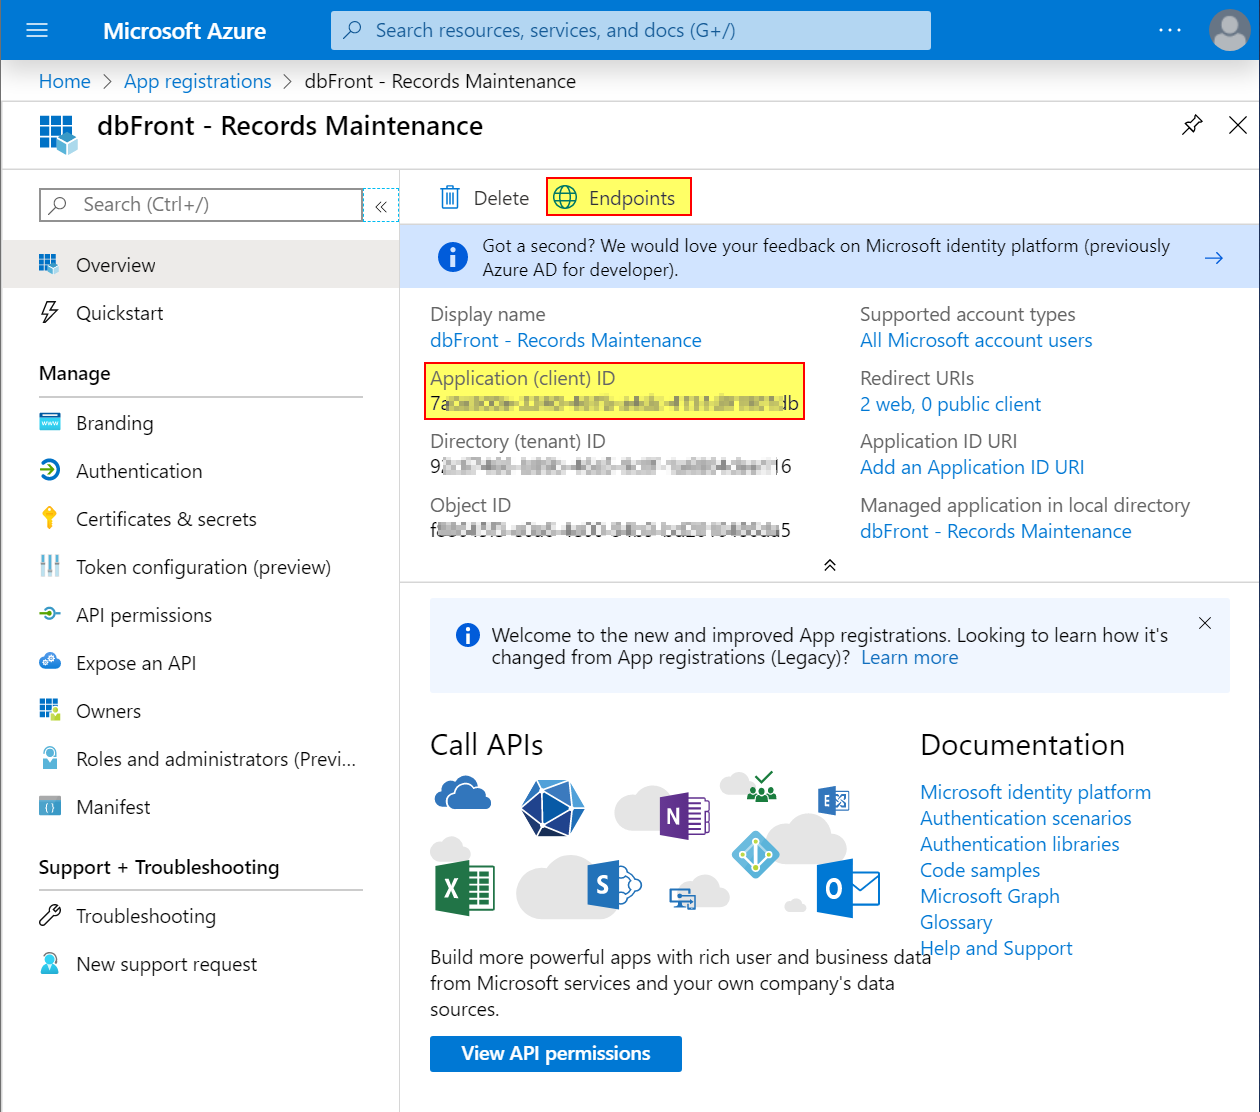
- Save the Application (client) ID and enter in dbFront as the dbFront Application Id (see below)
e.g. "7a0a500e-xxxx-xxxx-xxxx-4151d91907db" - Save the Directory (tenant) ID and enter in dbFront as the Azure Tenant Id (see below)
e.g. "92c67466-xxxx-xxxx-xxxx-1a6804dee116" - Inside the [Overview] screen click on [Endpoints],
- (a link above the details beside [Delete]),
- A side-window with multiple endpoints will appear,
- Save the SAML-P sign-on endpoint and enter in dbFront as the Azure Endpoint Url (see below)
e.g. "https://login.microsoftonline.com/92c67466-xxxx-xxxx-xxxx-1a6804dee116/saml2" - Close the [Endpoints].
Branding & Properties
- Publisher Domain: Update the domain to match your application domain,
- Update other settings as desired.
Certificates & Secrets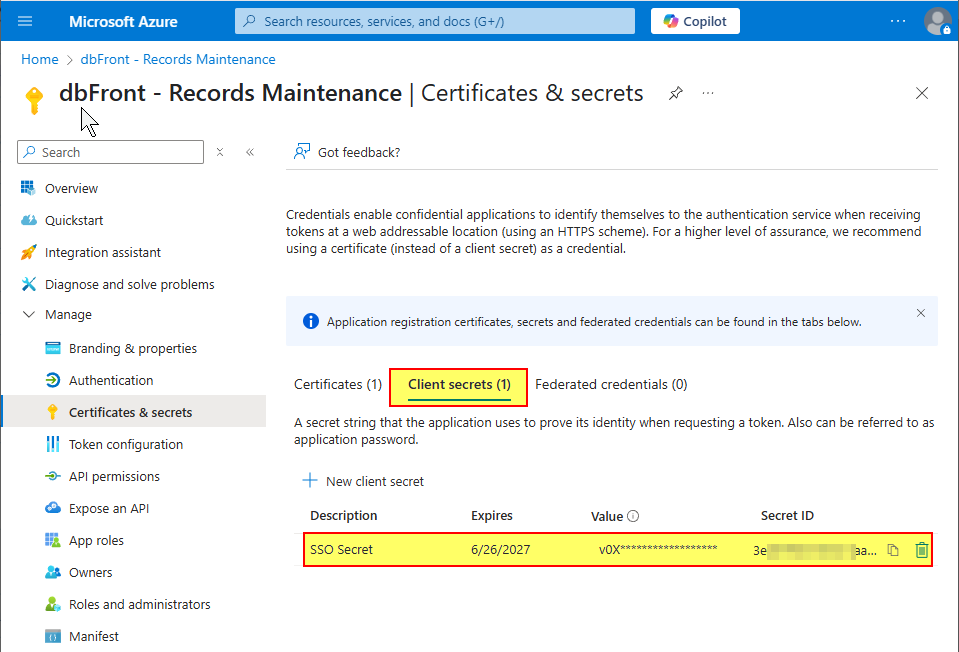
Create a secret that will be used by dbFront to access the Microsoft Graph database to retrieve additional information, such as the Group Names.
- Click "Client secrets",
- Assign a description such as "SSO Secret",
- Pick an expiry length
- Click Add.
- Copy the secret Value and save it as the Azure Client Secret (see below)
- You MUST remember to refresh this before the Secret Expiry.
Token configuration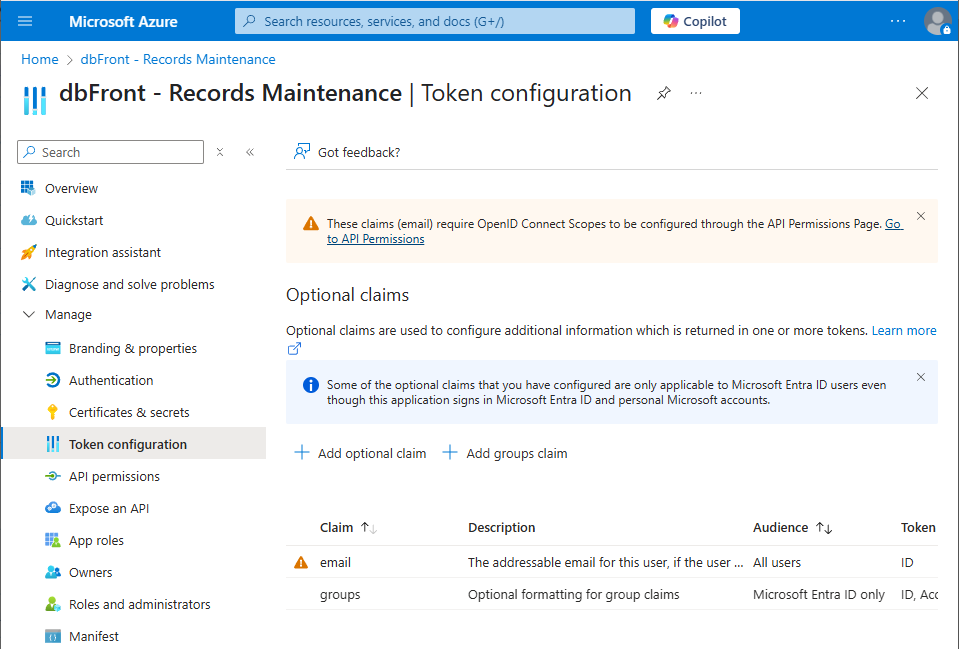
- Add the Email Token
- Click Add optional claim,
- Select the token type of ID,
- Select the Email token and click Add.
- Add the Groups Token
- Click Add groups claim,
- Check "Security groups",
- Choose "On Premises Group Security Identifier" for both ID and Access,
- Click Add.
API Permissions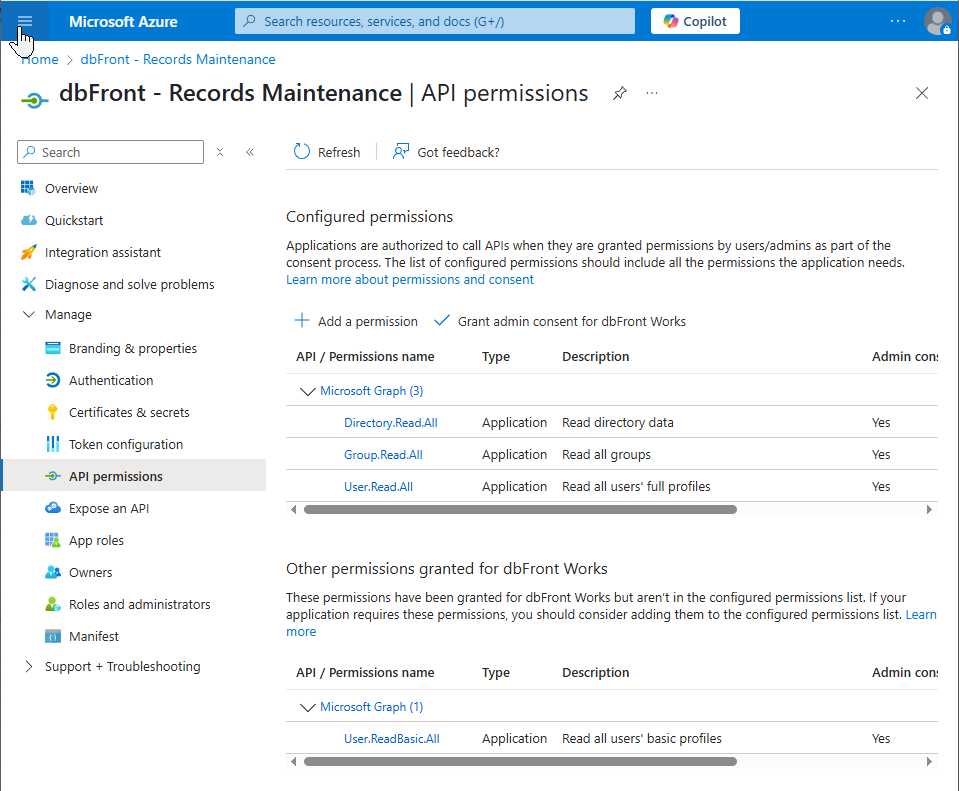
Add the following three permissions for Microsoft Graph
- User.Read.All.
- Group.Read.All,
- Directory.Read.All,
Manifest
Click on Manifest and verify the manifest JSON. The manifest JSON should contain all settings. Specifically verify the following:
- groupMembershipClaims: "SecurityGroup"
dbFront Application Setup Steps
Once the application is set up in Azure, you can then proceed with the setup in dbFront.
The Azure-specific instructions are: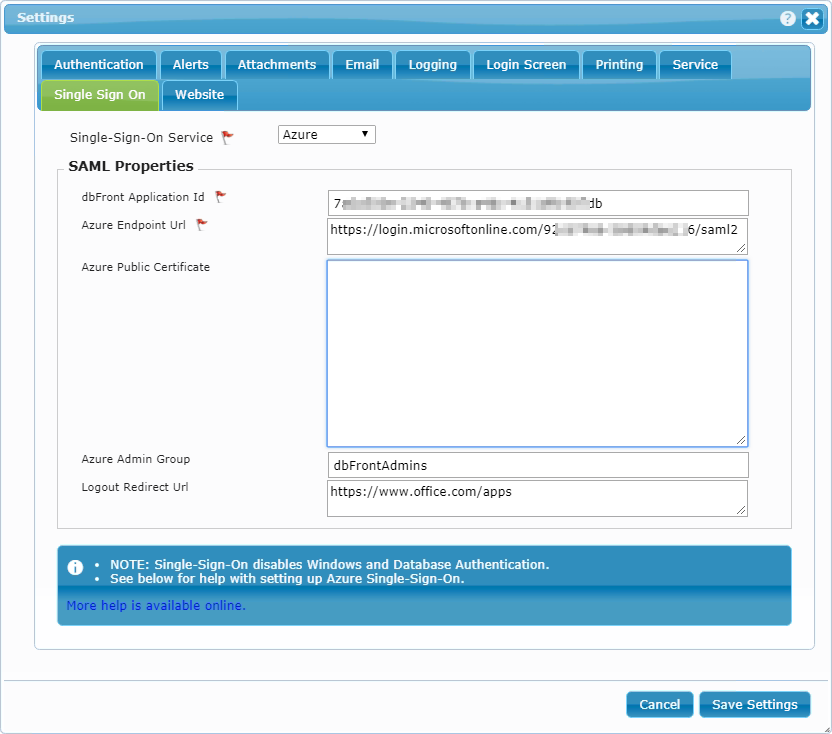
- Single-Sign-On Service: Azure,
- dbFront Application Id: From [Overview] config above,
- Azure Tenant Id: Collected from [Overview] config above,
- Azure Client Secret: Created in [Certificates & Secrets] above,
- Azure Endpoint Url: Collected from [Endpoints] config above,
- Azure Public Certificate: Enter if provided, leave blank for the Free Azure,
- Azure Admin Group: Either select a group from the dropdown or enter the Object Id of an Azure group. See Azure Groups below,
- Logout Redirect Url: Enter "https://www.office.com/apps?auth=1".
This special URL will allow users who log out of dbFront to return to the Microsoft Apps menu, where they can either log out completely or start another application.
For complete instructions on completing the dbFront Single-Sign-on setup, see: Single-Sign-on
Azure Groups and Users
Please review the Azure documentation for instructions on creating and assigning users and groups to the dbFront application.
Azure does not send the Group Names with the SAML authentication requests. To retrieve the group information, we recommend installing dbFront 1.4.1 or better, which can use the Microsoft Graph Database to retrieve the Group Names. Please review the following configuration sections and complete the missing configuration, paying special attention to:
- Azure Tenant Id from Overview,
- Azure Client Secret from Certificates & Secrets,
- Token Configuration,
- API Permissions
- dbFront Configuration of the Tenant Id, and Client Secret.
Trouble Shooting
Group Issues
For any issues with Azure Grouping, first double-check the settings in Azure Groups
Check the FAQ
For additional Single-Sign-On issues and answers see: Single-Sign-On Questions