
Okta Single-Sign-on Setup
The following describes how to set up Single-Sign-on in dbFront using Okta (Okta.com).
Okta is one of the premier identity providers in the industry.
Information Collection
When setting up Okta Single-Sign-on you need to collect or decide on the following pieces of information:
- Determine a display name for your application. e.g. "dbFront - Records Maintenance",
- Determine the root URL for your dbFront install. This would be something like:
- https://dbFront.YourCompany.com/dbFront/ (public server with SSL)
- http://YourServer/dbFront/ (internal server without SSL)
- Create a unique application id: A suggested value is "sp.dbFront.YourCompany.com",
- Determine / Create an Okta group for administrators: e.g. "dbFrontAdmins"
Okta Application Setup Steps
Before proceeding, it would be good to review the Okta documentation for adding a SAML2 application. See: Okta SAML 2
- Browse to the Okta login page: https://yourcompany.okta.com,
- Complete the login,
- Click on the Applications link on the top menu to view the configured applications,
- Click on the big green Create New App button to configure a new application,
- Choose the "Sign on method SAML 2.0" and click next,
- Wizard page 1 "General Settings":
- App Name: e.g. "dbFront - Records Maintenance",
- App logo: Adjust the Logo as desired.
- Click Next,
- Wizard page 2 "SAML Settings":
- Single sign-on URL: This should match the root URL for your dbFront install, e.g. "https://dbFront.YourCompany.com/dbFront/default.aspx",
Note: The "/default.aspx" must be included when using Okta, - Audience URI (SP Entity ID): This value must match the dbFront Application Id configured in dbFront, the value suggested above was "sp.dbFront.YourCompany.com",
- Group Attribute: Add the group attribute "memberOf":
- The name must be "memberOf",
- The format should be "Basic",
- You must select a filter with a value or no groups will be returned,
e.g. Contains: admin
- Download and save the Okta Certificate.
- Single sign-on URL: This should match the root URL for your dbFront install, e.g. "https://dbFront.YourCompany.com/dbFront/default.aspx",
- Click Next,
- Wizard page 3 "Feedback",
- Are you a customer or partner: Select "I'm an Okta customer adding an internal app".
- App type: Check "This is an internal app that we have created"
Note: This is required because dbFront is a client-installed application instead of a SAAS service.
- Click Finish to save the application settings,
- Once the application is created it will reopen with the "Sign On" tab visible,
- The "Sign On" tab will contain a notice with further instructions,
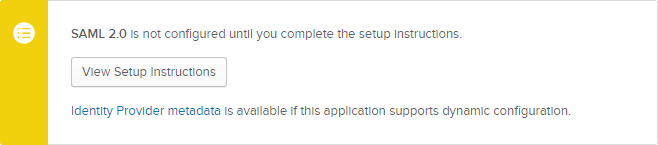
- Click on the "View Setup Instructions" to retrieve the information needed for dbFront,
- A new window will open with the title "How to Configure SAML 2.0 for dbFront - Records Maintenance Application",
- Please save the following (Copy => Paste):
- Identity Provider Single Sign-On URL: Enter in dbFront as the Okta Endpoint Url (see below),
- X.509 Certificate: Enter in dbFront as the Okta Public Certificate (see below),
Okta Groups and Users
Please review the Okta documentation for instructions on creating and assigning users and groups to the dbFront application.
dbFront Application Setup Steps
After creating the application in Okta, you can then proceed with the setup in dbFront.
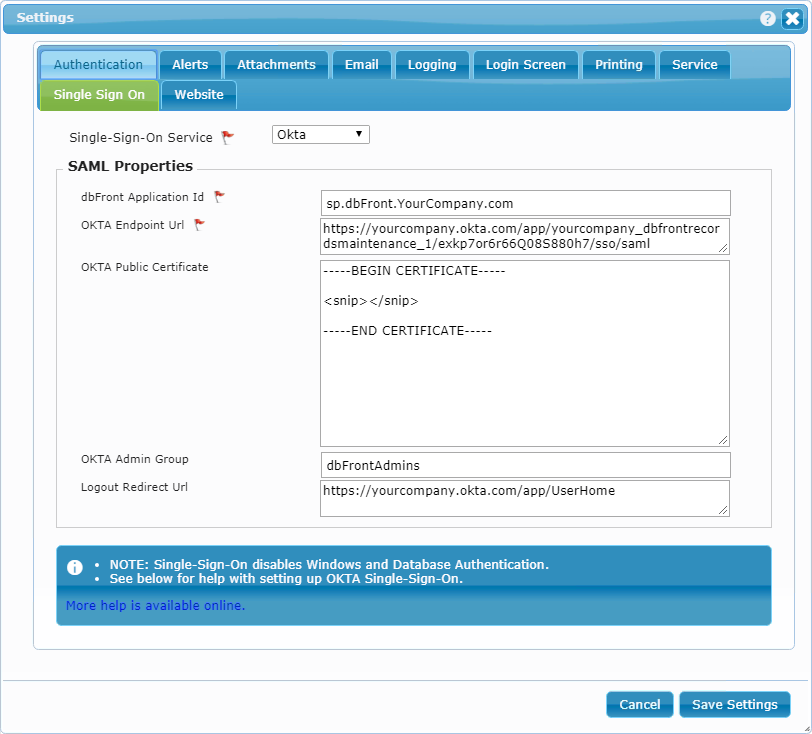
The Okta specific instructions are:
- Single-Sign-On Service: Okta,
- dbFront Application Id: sp.dbFront.YourCompany.com,
- Okta Endpoint Url: As collected from SAML config above,
- Okta Public Certificate: As collected from SAML config above,
- Okta Admin Group: Enter the name of the Okta admin group that should have admin access to dbFront,
- Logout Redirect Url: Enter "https://yourcompany.okta.com/app/UserHome"
This special URL will allow users who log out of dbFront to return to the Okta menu where they can either log out completely or start another application.
For complete instructions on completing the dbFront Single-Sign-on setup see: Single-Sign-on
Trouble Shooting
For a list of Single-Sign-On issues and answers see: Single-Sign-On Questions