
Windows Identity - Single Sign-On Setup
The following describes how to set up the Windows Identity based Single-Sign-on. The following are required:
- The feature Windows Authentication must be enabled on the Server or Workstation.
- The Authentication for the application/site much have Windows Authentication selected.
- Windows Identity (IIS) must be selected as the Single-Sign-On Service in dbFront.
1. Feature Installation
DISM Install
The simplest option for any Server or Workstation Windows Install, is to run the following DISM commands in a Admin Console.
To check if the feature is installed.
DISM /online /Get-FeatureInfo /FeatureName:IIS-WindowsAuthentication
To install the feature.
DISM /online /Enable-Feature /FeatureName:IIS-WindowsAuthentication
Manual Install
Alternately, you can use the Workstation / Server Dialogs to setup the Windows Authenticaton feature.
In either Windows Server or Windows Desktop, you can search for "Windows Features" in the task bar and the appropriate configuration dialog will be loaded.
Windows Workstation
- Search for "Windows Features" in the task bar.
- A Windows Features app will appear.
- You can then browse to "Internet Information Services" / "World Wide Web Services" / "Security" and enable "Windows Authentication".
- Once this is set then you should reset IIS so that the option will appear in IIS Manager.
Windows Server
- Open Server Manager on your Windows Server.
- Click on Manage in the upper-right corner and select Add Roles and Features.
- Click Next through the introductory screens until you reach the Server Roles section.
- Expand Web Server (IIS) > Web Server > Security.
- Look for Windows Authentication in the list and check the box next to it. (If prompted to add required features, click Add Features).
- Click Next, then click Install.
- Reset IIS to ensure that the feature is loaded.
2. IIS Configuration
Once Windows Authentication is installed as a Windows Feature, then you can configure it using the Internet Information Services Manager (IIS).
- Open IIS Manager
- Select the Server, Site or Application you want to manage.
The Authentication can be configured at the Server, or for an entire Site, or only for a specific Application. - Select Authentication located under the IIS section.
- Disable the "Anonymous Authentiction"
- Enable the "Windows Authentication"
3. dbFront Configuration
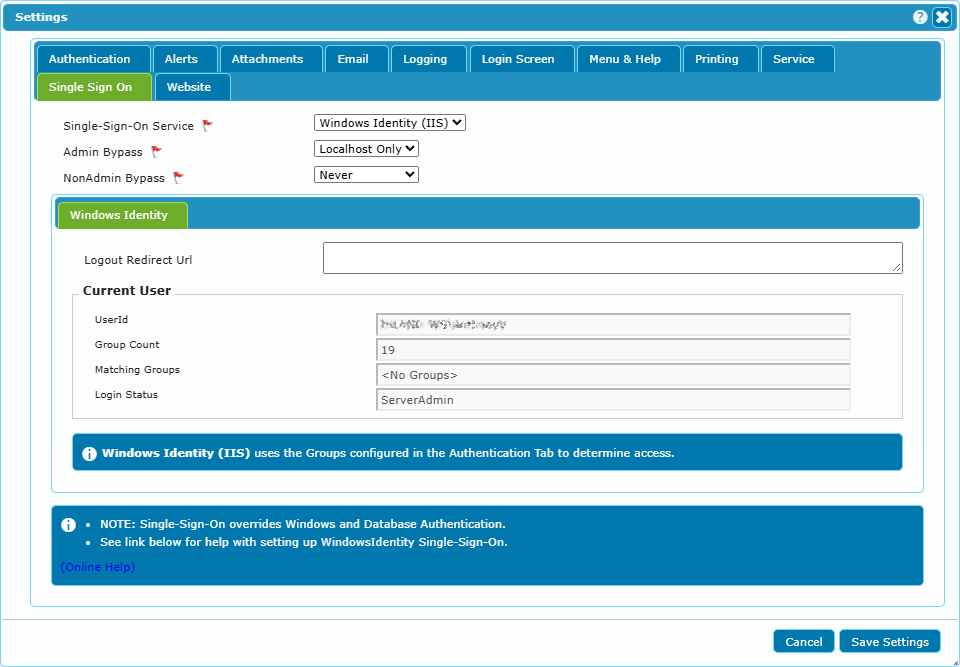
Once the workstation or server is configured, then only a single setting change is required in dbFront.
- Open the Settings dialog.
- Select Single Sign On.
- Select "Windows Identity (IIS)"
- Verify that your current username is displayed.
- If yes, then click save.
Running both SSO and Non-SSO
Because Windows Indentity base Single-Sign-On can be configured at the Web Application level, it becomes possible to duplicate the dbFront Web Application (reusing the exact same install folder), and configuring a second Application in IIS with different settings. This makes it is possible to have two different Urls to the same dbFront install, with one using SSO, and the other requesting login credentials. e.g.
- https://%servername%/dbFront
- https://%servername%/dbFront-SSO
For complete instructions on completing the dbFront Single-Sign-on setup see: Single-Sign-on
Trouble Shooting
For a list of Single-Sign-On issues and answers see: Single-Sign-On Questions