
Table Preferences

The Table Preferences is where you set up how the table will appear including the fields that will be available in the grid and details pane.
You can view the latter part of the video Adventure Works in 5 Minutes to see a walkthrough of the Table Preferences.
To access the Table Preferences you would click on the gear icon next to the table name in the details tab. You can see the details tab in the image to the right.
Table Preferences include the following:
- Main Table Preferences,
- Layout,
- Table,
- Form Fields,
- Search Fields,
- Events,
- Fields,
- Relationships,
- Table Views,
- Row Security,
- Action Buttons,
- User Help,
- Tools.
Main Table Preferences
The main preferences allow you to set the table caption, caption fields, and role.
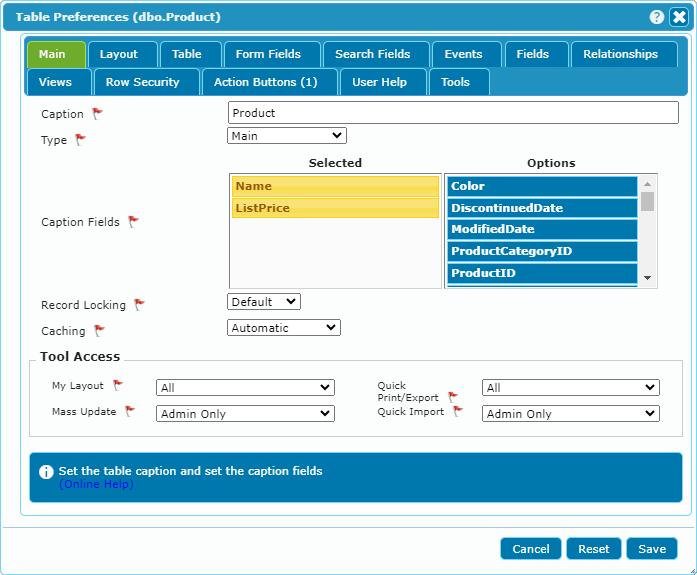
- Caption: The Display name of the table as seen in the menu and other places.
- Type: This option allows you to change how this table is accessed and used. For more details, see the Manage Tables section of the page Database Preferences.
- Caption Fields: The fields that are used to name the current row. In the example, we chose the Lastname and Firstname columns. You can see this in action in the full-page image at the top of the screen.
- Record Locking: The ability to automatically lock the current record so users can edit it without fear of losing data, or having it changed without consent.
- Caching: Storing data temporarily so it can be served faster when requests come up.
- Tool Access
- My Layout: The ability to create a personalized layout of your screen.
- Mass Update: Allows you to select a large number of records and safely apply a single update to them all.
- Quick Print/Export: Allow Admin or all users to create and run their own Quick Reports.
- Quick Import: Allow Admin or all users to perform a Quick Import.
Layout
The Layout tab is used to specify how you want the form to be arranged.

- Main Layout: [Table Over Tabs, Table Beside Detail]
- Table Over Tabs - Default View, the Table will take up the full width of the screen.
- Table Beside Detail - Attempt to place the Table and Form beside each other.
- CSS Class: CSS class to assign to the form. That allows further layout customization via CSS.
- Table
- Min Width: Minimum Table width in pixels, determines if the Form should be pushed below the Table.
- Default Rows: Default number of rows to display. It is not unusual to set this to 1.
- Element Order: This allows you to place the Advanced Search above or below the table grid and the custom search buttons above, below, or in between.
- Form
- Min Width: Minimum Form width in pixels, determines if the Form should be pushed below the Table.
- Max Columns: Maximum field columns. (Ignored in some browsers).
- Form Column
- Min Width: Minimum amount of space to leave each column in Pixels.
- Label Position: Default placement of the field's label, [Left, Right, Top, Inline, None]. It can be overridden at the field level.
- Form Buttons
- Width: The width of the buttons. The range is 50 to 500.
- Position: Default placement of the buttons, [Beside left, Below form]
- Group Labels: Hidden, or Display custom.
Table
The Table tab has two tabs, Table Fields and the Default Sort Order.
Table Fields
The Table Fields tab is where you select and arrange the columns that appear in the table at the top of the screen. For the Selected items there are three options. Default, Editible, Read only. In your database preferences, you can decide if grid editing is enabled or not.
- Paging/Scrolling: You can scroll or page through the records.
- Row CSS Class: Where you can specify the CSS class name.
- Sticky Columns: The ability to ensure some columns are always visible.
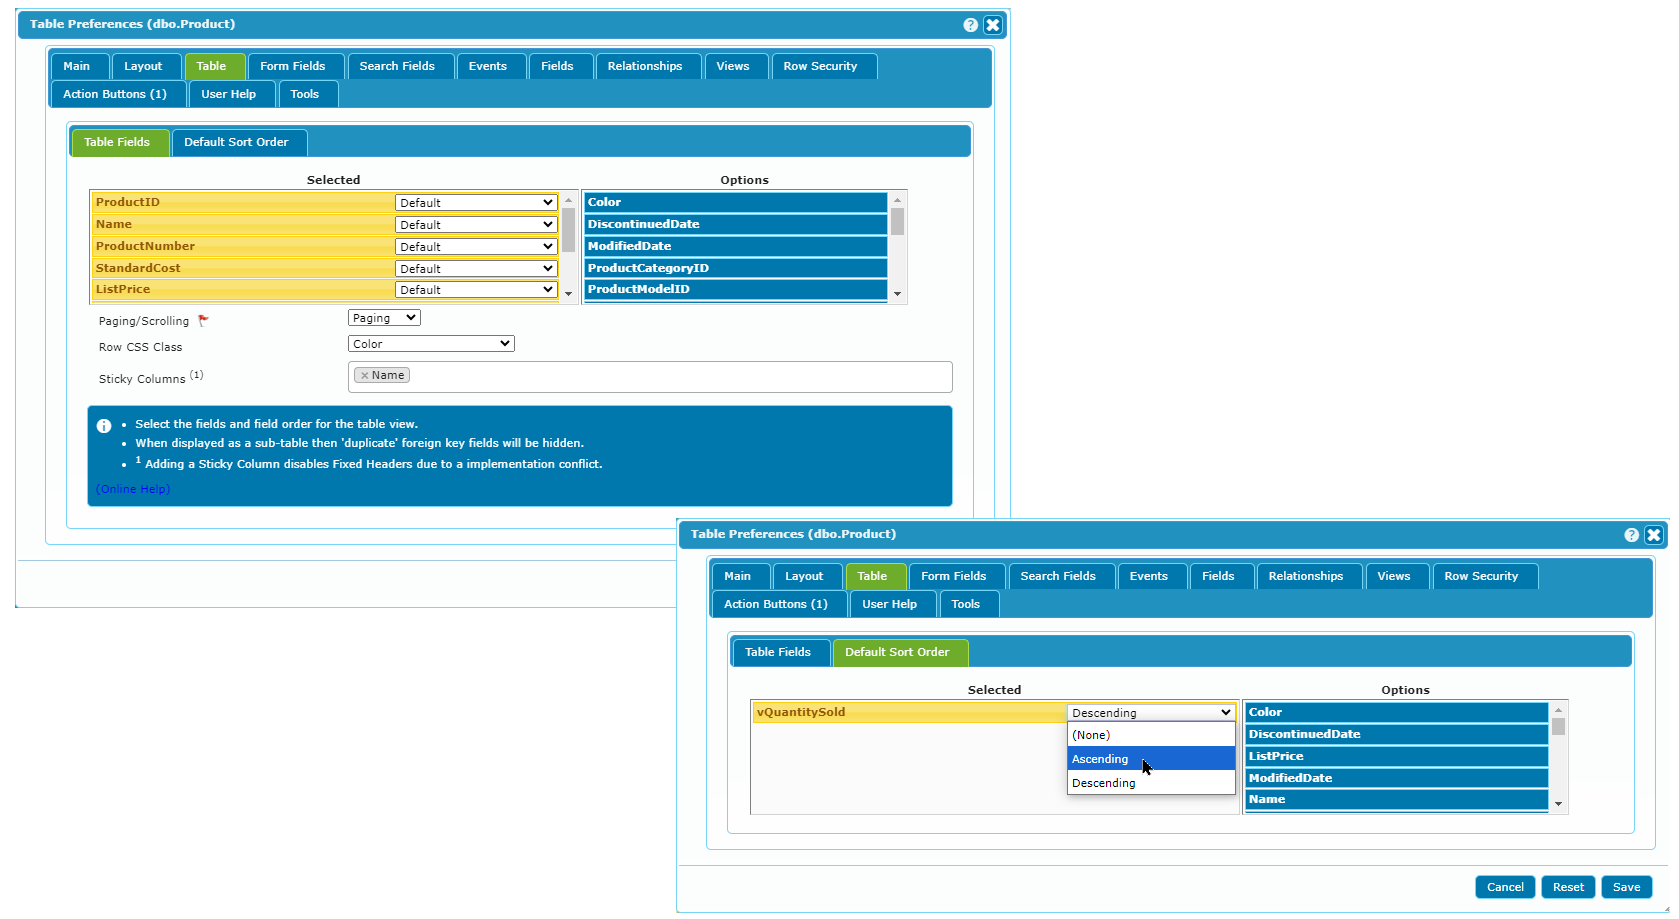
If a column points to a lookup table then the lookup value will be used. The fields used from the lookup table are determined by adjusting the field's lookup columns in the Field Preferences.
Default Sort Order
This sets the initial sort order of the table.
Form Fields
The Form Fields tab is similar to the Table tab but it is used to add, remove, or rearrange the fields that will be visible in the details pane.
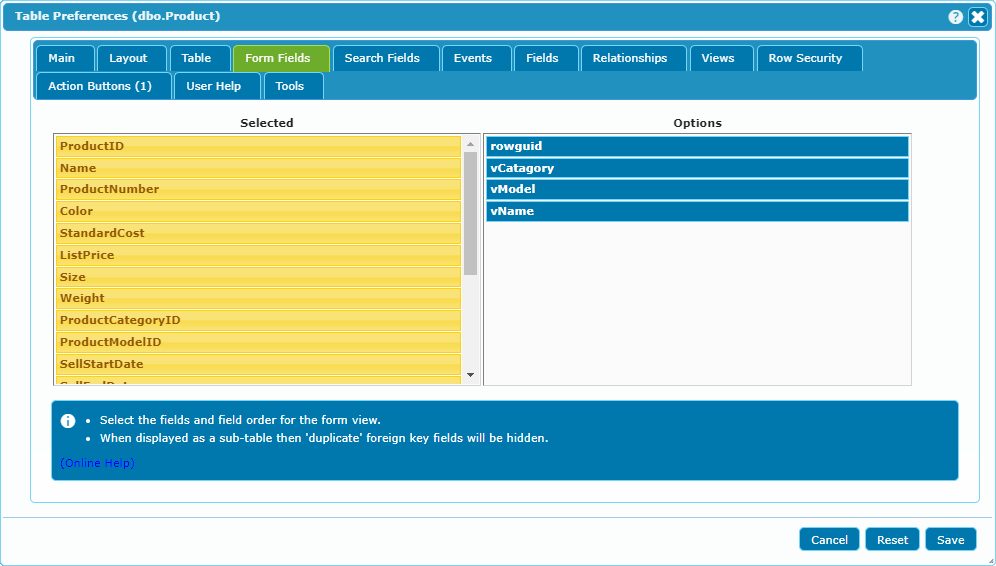
dbFront will use the field list along with what it knows about the screen space available to make a display that is as useful as possible.
Once you save the table preferences, you can open the Field Preferences for the displayed fields to further adjust how the fields appear and interact with the user.
Search Fields
The Search Fields tab is where you specify what fields a user can use for Advanced Searches. With Default Visibility you can adjust how the advanced search is seen. [Default Closed, Always Open, Default Open]
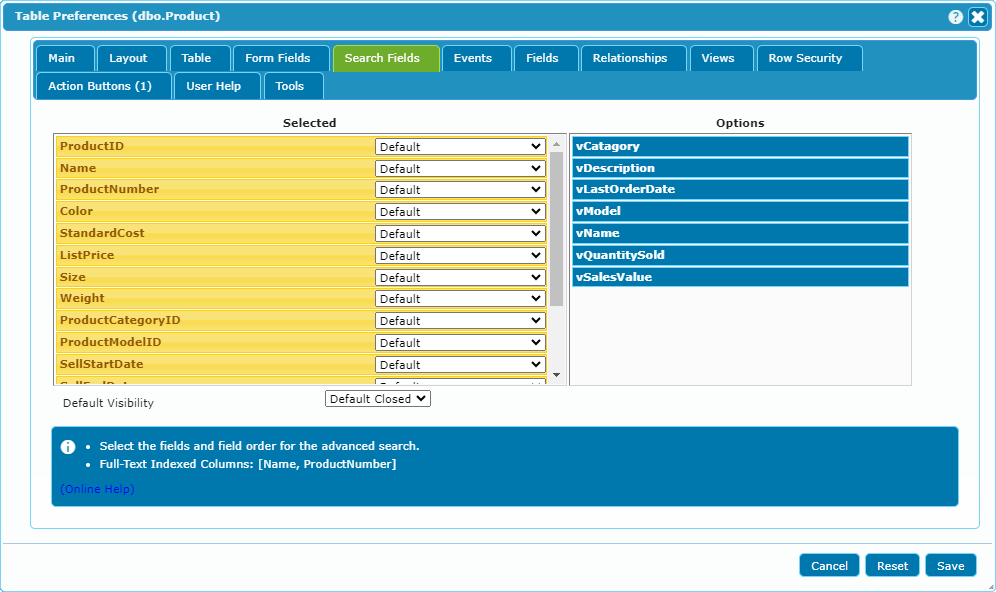
To see how users can use the search fields see: Searching and Filtering
Events
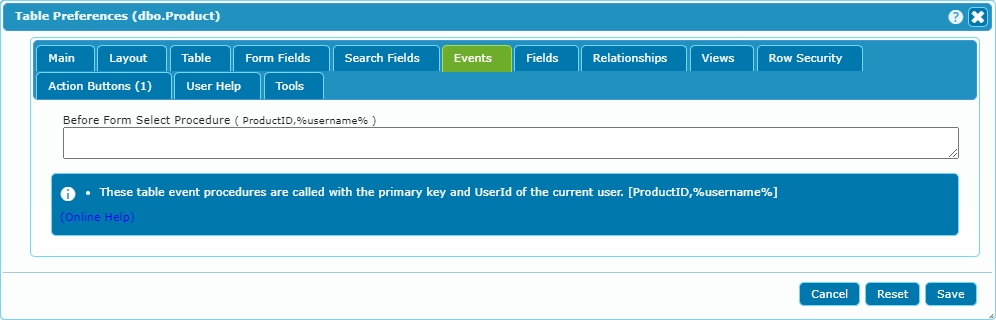
You can set dbFront up so that before the form is loaded you can optionally call a stored procedure to prepare the data.
The store procedures are called with the primary key and UserId of the current user.
Fields
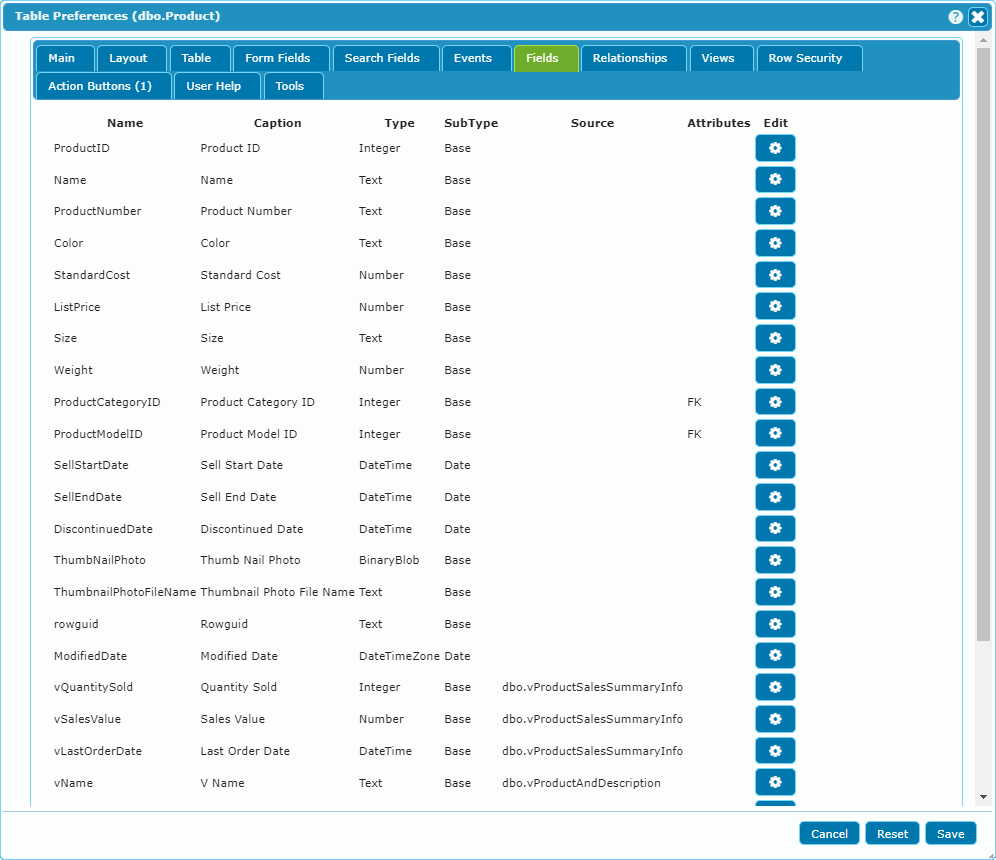
The fields tab is a place where administrators can edit any field's properties, even if the field cannot be seen on the form.
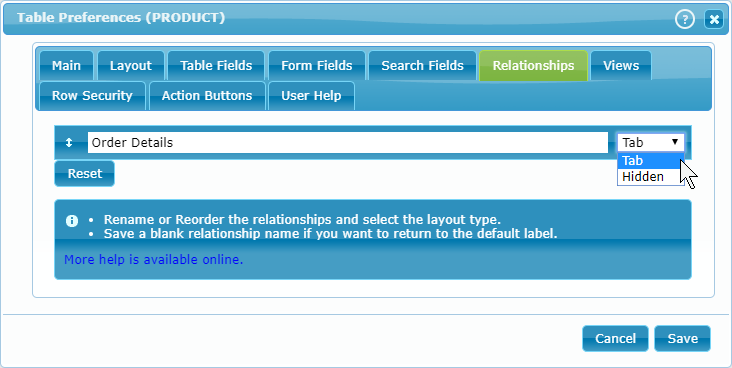
Relationships
You can rename, reorder, or hide specific table relationships in the Relationships tab.
TableViews
The Table Views tab allows for the ability to add one or more views to a table. The purpose of table views is to make extra column information available. For more details see Table Views.
Row Security
The Row Security tab is used to manage user access to the individual table rows. For more details see Row Security.
Action Buttons
The Action Buttons tab is used to add, delete, rename, or rearrange the action buttons assigned to this table.

Once you have created a button you will need to save your changes so that you can then see and set up what the button will do. For more details see the topic: Action Buttons
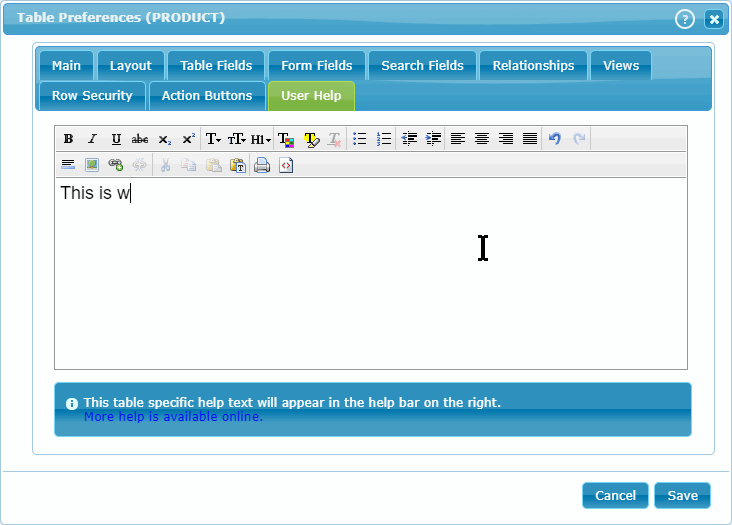
Custom Help
dbFront supports the ability to set up Table, Field, Button, and even Record level help. The Table help appears when the Sidebar Help is visible.
Tools
The tools tab currently has two tools to help work with tables. A tool to help generate Single-Select and Multi-Select lookups, and a tool to help analyze the performance impact of Table Views. Both tools are listed below.
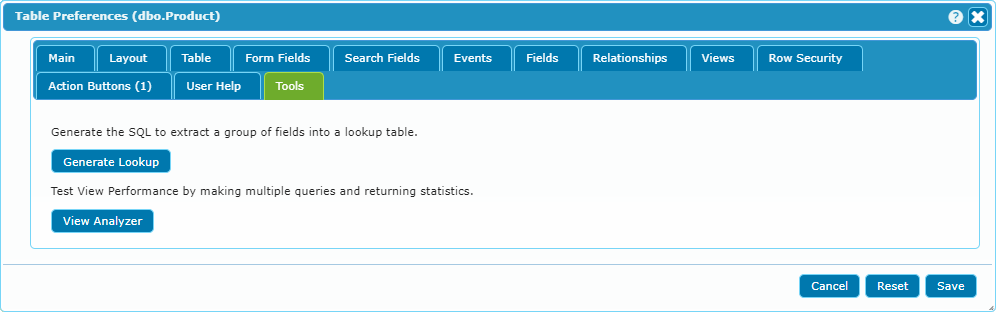
Generate Lookup
dbFront can generate the SQL needed to extract a group of fields into a new lookup table. This helps with the database normalization process, which can also make your forms more intuitive.
This tool can generate the SQL for both single-select and multi-select lookups.
View Analyzer
The View Analyzer helps you test the performance of Table Views that you have linked to the current table. This only analyzes views that have columns appearing on the Table Grid. If a view's columns don't appear on the Table Grid, then that view can't have any impact on the loading performance so the View Analyzer won't report anything for that view.
dbFront will analyze the view by running multiple queries and comparing the performance for each selected view column. The currently selected table record will be used to drive most of the queries, so if a different record would affect the view logic, then you will need to test with multiple table records.
dbFront will return the SQL Server-provided statistics in a formatted grid for easy comparison. This functionality currently only works for SQL Server.
The View Analyzer is found under the Tools tab in the table preferences.
Next Step
The next step is to:
- Adjust the Field Preferences as needed
- Add some Action Buttons for advanced functionality